Course
Loop Control
JavaScript Tutorial
This JavaScript tutorial is crafted for beginners to introduce them to the basics and advanced concepts of JavaScript. By the end of this guide, you'll reach a proficiency level that sets the stage for further growth. Aimed at empowering you to progress towards becoming a world-class software developer, this tutorial paves the way for a successful career in web development and beyond.
Loop Control
JavaScript Loop Control
JavaScript provides full control to handle loops and switch statements. There may be a situation when you need to come out of a loop without reaching its bottom. There may also be a situation when you want to skip a part of your code block and start the next iteration of the loop.
To handle all such situations, JavaScript provides break and continue statements. These statements are used to immediately come out of any loop or to start the next iteration of any loop respectively. Also, JavaScript allows developers to use labels to name the loop.
We have explained the keywords in the below table, which can be used to control the loop.
In the upcoming chapters, we will learn in detail about the break, continue and label statements.
The break Statement
The JavaScript break statement, which was briefly introduced with the switch statement, is used to exit a loop early, breaking out of the enclosing curly braces.
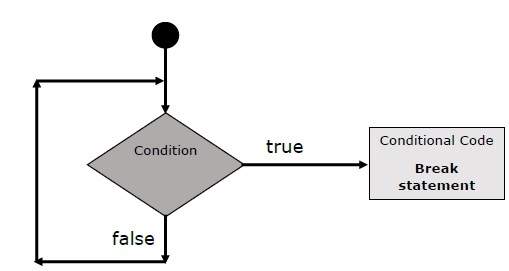
Flow Chart
The flow chart of a break statement would look as follows
Example
The following example illustrates the use of a break statement with a while loop. Notice how the loop breaks out early once x reaches 5 and reaches
<html><body> <div id = "output"> </div> <script> const coutput = document.getElementById("output"); let x = 1; coutput.innerHTML = "Entering the loop<br> "; while (x < 20) { if (x == 5) { break; // breaks out of loop completely } x = x + 1; coutput.innerHTML += x + "<br>"; } coutput.innerHTML += "Exiting the loop!<br> "; </script> <p>Set the variable to different value and then try...</p></body></html>Output
Entering the loop2345Exiting the loop!Set the variable to different value and then try...The continue Statement
The JavaScript continue statement tells the interpreter to immediately start the next iteration of the loop and skip the remaining code block. When a continue statement is encountered, the program flow moves to the loop check expression immediately and if the condition remains true, then it starts the next iteration, otherwise the control comes out of the loop.
Example
This example illustrates the use of a continue statement with a while loop. Notice how the continue statement is used to skip printing when the index held in variable x reaches 5
<html><body> <div id = "output"> </div> <script> const coutput = document.getElementById("output"); let x = 1; coutput.innerHTML = "Entering the loop<br> "; while (x < 10) { x = x + 1; if (x == 5) { continue; // skip rest of the loop body } coutput.innerHTML += x + "<br>"; } coutput.innerHTML += "Exiting the loop!<br> "; </script> <p>Set the variable to different value and then try...</p></body></html>Output
Entering the loop234678910Exiting the loop!Set the variable to different value and then try...Using Labels to Control the Flow
Starting from JavaScript 1.2, a label can be used with break and continue to control the flow more precisely. A label is simply an identifier followed by a colon (:) that is applied to a statement or a block of code. We will see two different examples to understand how to use labels with break and continue.
Line breaks are not allowed between the 'continue' or 'break' statement and its label name. Also, there should not be any other statement in between a label name and associated loop.
Try the following two examples for a better understanding of Labels.
Example 1
The following example shows how to implement Label with a break statement.
In the example below, we have given the 'outerloop' and 'innerloop' labels to the loop.
We used the 'break' statement in the nested loop with the label. In the output, you can see that it breaks the outer loop from the inner loop.
<html><body> <div id = "output"> </div> <script> const coutput = document.getElementById("output"); output.innerHTML = "Entering the loop!<br /> "; outerloop: // This is the label name for (let i = 0; i < 5; i++) { output.innerHTML += "Outerloop: " + i + "<br />"; innerloop: for (let j = 0; j < 5; j++) { if (j > 3 ) break ; // Quit the innermost loop if (i == 2) break innerloop; // Do the same thing if (i == 4) break outerloop; // Quit the outer loop output.innerHTML += "Innerloop: " + j + " <br />"; } } output.innerHTML += "Exiting the loop!<br /> "; </script></body></html>Output
Entering the loop!Outerloop: 0Innerloop: 0Innerloop: 1Innerloop: 2Innerloop: 3Outerloop: 1Innerloop: 0Innerloop: 1Innerloop: 2Innerloop: 3Outerloop: 2Outerloop: 3Innerloop: 0Innerloop: 1Innerloop: 2Innerloop: 3Outerloop: 4Exiting the loop!Example 2
In the below code, we use the continue statement with a label inside the nested loop to skip the current iteration of the outer loop. Whenever the value of q becomes 3, it skips the execution of the remaining code of the current iteration and starts a new iteration.
<html><head> <title> JavaScript - Label statement </title></head><body> <p id = "output"> </p> <script> let output = document.getElementById("output"); output.innerHTML += "Entering the loop!<br /> "; outerloop: // This is the label name for (let p = 0; p < 3; p++) { output.innerHTML += "Outerloop: " + p + "<br />"; for (let q = 0; q < 5; q++) { if (q == 3) { continue outerloop; } output.innerHTML += "Innerloop: " + q + "<br />"; } } output.innerHTML += "Exiting the loop!<br /> "; </script></body></html>Output
Entering the loop!Outerloop: 0Innerloop: 0Innerloop: 1Innerloop: 2Outerloop: 1Innerloop: 0Innerloop: 1Innerloop: 2Outerloop: 2Innerloop: 0Innerloop: 1Innerloop: 2Exiting the loop!